Step-by-step video and picture instructions on how to install and use Lock Laces®, the original elastic no-tie shoelaces
--------------
Looking for how to put on your new Lock Laces®? You’ve come to the right place. Follow us through this simple 5-minute installation guide and never tie your shoes again™!
What Should You Have?
When you open your package of Lock Laces®, you should find the following:
- 2 48” Elastic Shoelaces
- 2 lock devices
- 2 cord clips

If you don’t have any Lock Laces® yet, what are you waiting for? Order yours here now.
You will also need:
- 1 pair of shoes
- 1 pair of scissors
Alright, now that we have everything we need, let's get started!
Step 1: Replace Your Laces
Put your feet in the shoes. We always recommend keeping your feet in the shoes throughout the installation process to ensure a proper fit.
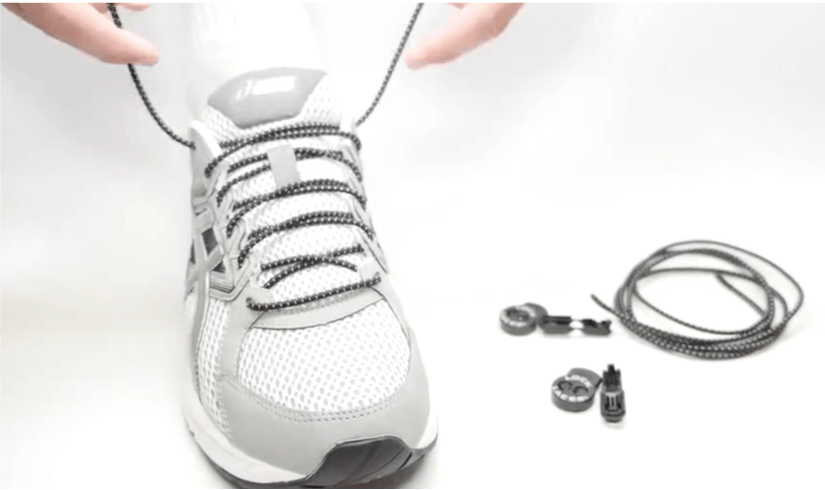
Now remove your old shoelaces and lace up with your new elastic shoelaces.
Step 2: Lock-In
Grab a lock device (the piece that says “LOCK LACES®” on it). Press down on the top of the lock to open the passages, and thread the ends of the laces through the passages with your other hand.
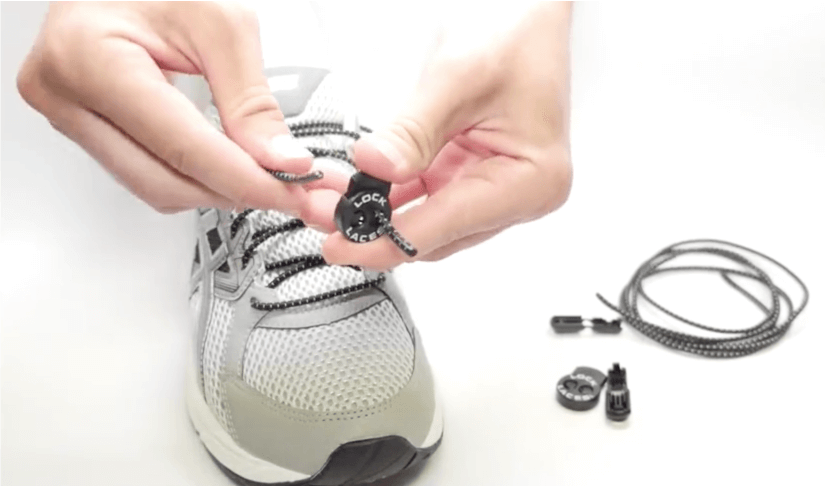
Once the laces have been threaded through, press down on the top of the lock again and slide the lock to the tongue of the shoe. Release to secure the lock device into place.
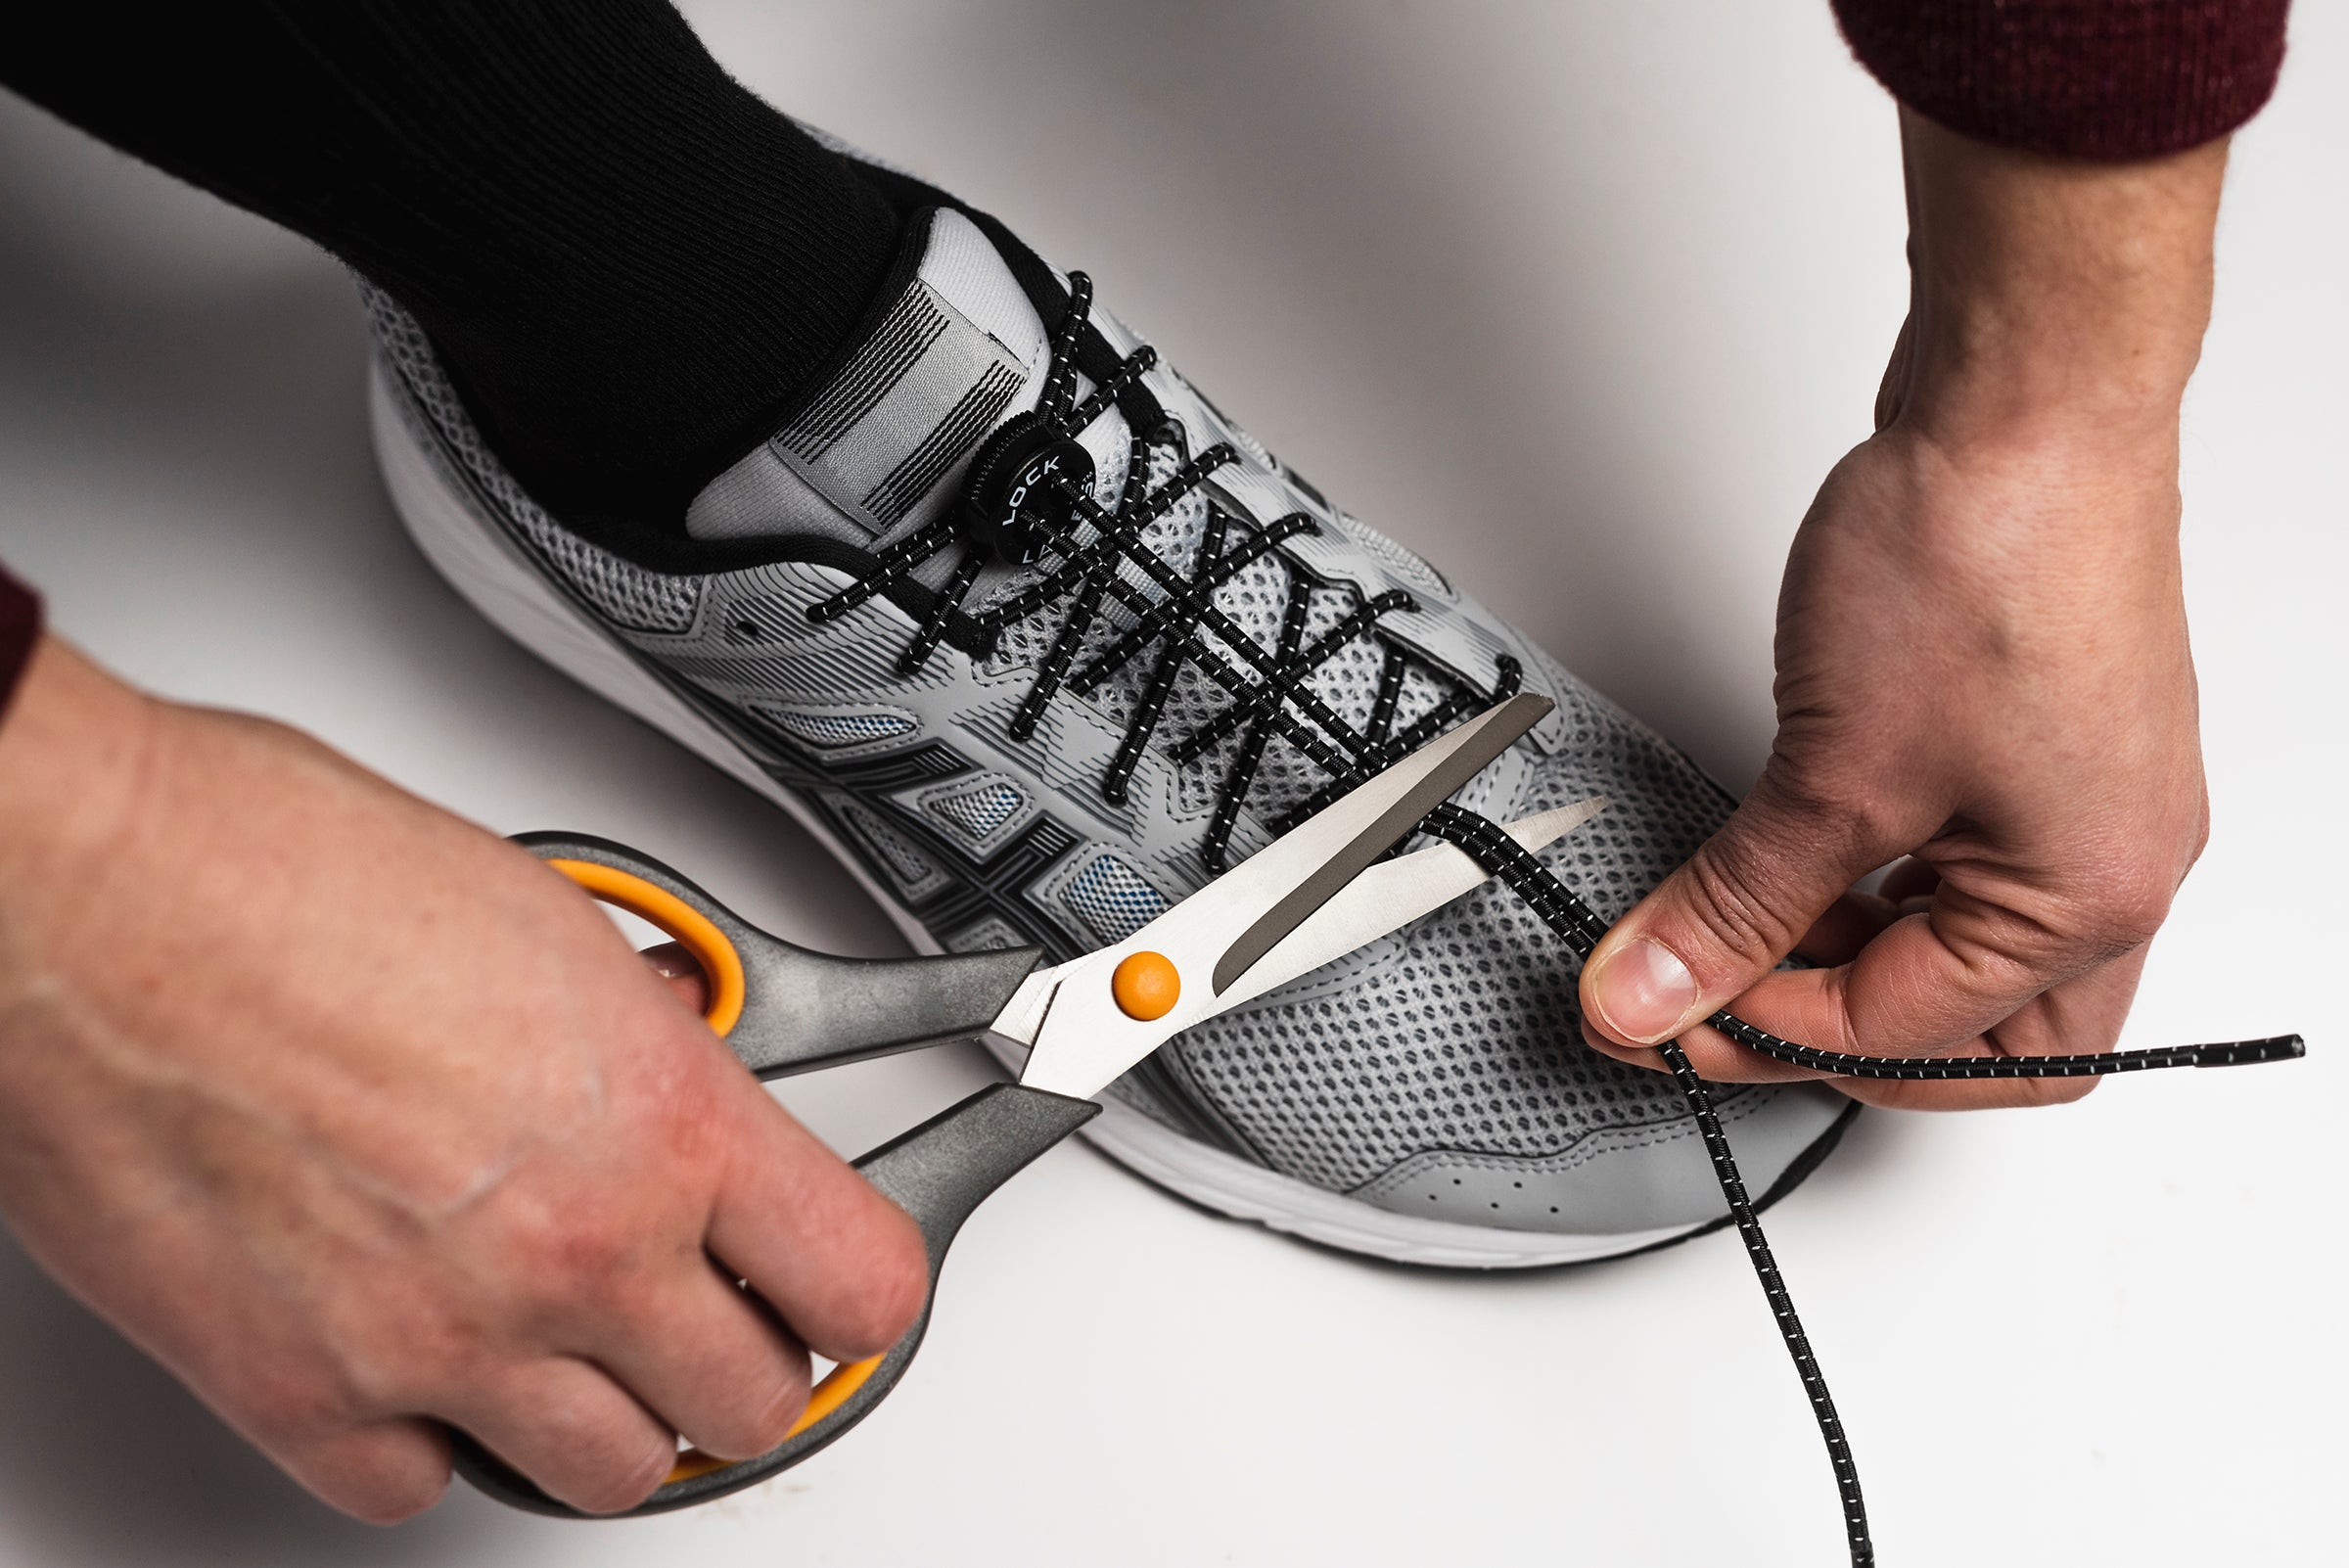
Step 3: Trim to Fit
Before trimming the excess lace, make sure your laces fit snugly but are not too tight. We recommend wiggling your foot in the shoe or, better yet, standing up and walking around the room to make sure they are at a comfortable length. If your laces are too tight, slide the lock toward the toe of the shoe slightly, readjust the laces and repeat.
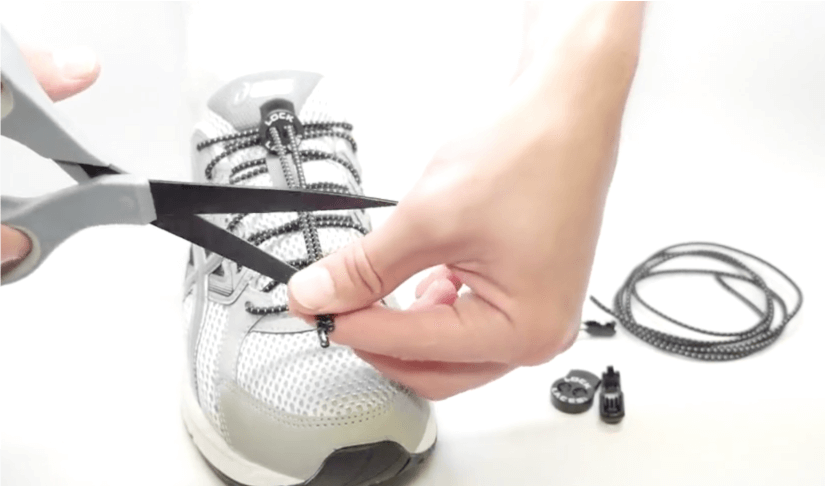
Once your laces fit comfortably, use a pair of scissors to trim off some of the excess lace. We recommend cutting about 2-3 inches below the lock device to leave room for future adjustments.
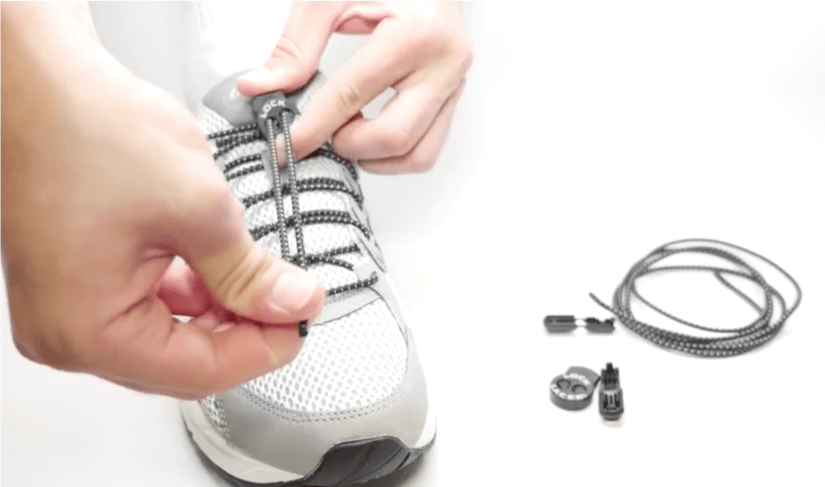
Step 4: Secure
Finally, slide the cord clip onto the ends of the laces and align the trimmed ends with the teeth inside the cord clip. It is very important that you align the ends with the cord clip properly to ensure that the cord clip stays securely attached. Then, simply snap the cord clip together to secure.

If you have any difficulty with your cord clip, please see our article on reopening and reinstalling your cord clip.
Congratulations!
Your Lock Laces® are now installed and guaranteed for the life of your shoe. If you have any questions or experience any difficulty with installation, please contact us. We’re always happy to help.
Comments (14)
Love these! Have tried a more expensive competing brand only to be met with great disappointment.
Good instructions and easy to use!
I really like these!
The instructional video was very helpful..
I love the Lock Laces! Great price and they are long lasting. I curentley have been using Hickies and have to replace some of the pieces because they break and they are over priced. I am now a Lock Lace customer
The cord clip at the end is a little tough. I (gently) used a pair of plyers to close the little clips all the way. It worked very well.
I heard about these on Bob and the Showgram I am extremely excited to try them with my son who has special needs!!! God bless!!!
Leave a Comment